In the next part of the series, we will create a simple 1GB iSCSI virtual disk, assign it to the already configured target and verify the disk is visible to the iSCSI initiators.
New-IscsiVirtualDisk -Description “Witness Disk” -Path g:\iscsivirtualdisks\Witness00.vhd -Size 1GB -ComputerName labtarget -Verbose (Create the 1GB iSCSI virtual disk)
Add-IscsiVirtualDiskTargetMapping -TargetName Target00 -Path g:\iscsivirtualdisks\Witness00.vhd -Verbose (Map the disk to the existing target device)
Enter-PSSession -ComputerName hyperv03 (Remote into one of the hosts Hyperv03)
Get-Disk (Use this command to display a list of the disks and status)
Set-Disk -Number 2 -IsOffline $false (Bring the disk online)
Set-Disk -Number 2 -IsReadOnly $false (Make the disk writable)
Initialize-Disk -Number 2 -PartitionStyle mbr (Initialize the disk)
Get-Disk (Verify the status after the set-disk steps)
Get-Disk -Number 2 | New-Partition -UseMaximumSize | Format-Volume -FileSystem ntfs -NewFileSystemLabel WitnessDisk (Partition and format the new iSCSI virtual disk with the piped cmdlets)
The screenshot is attached: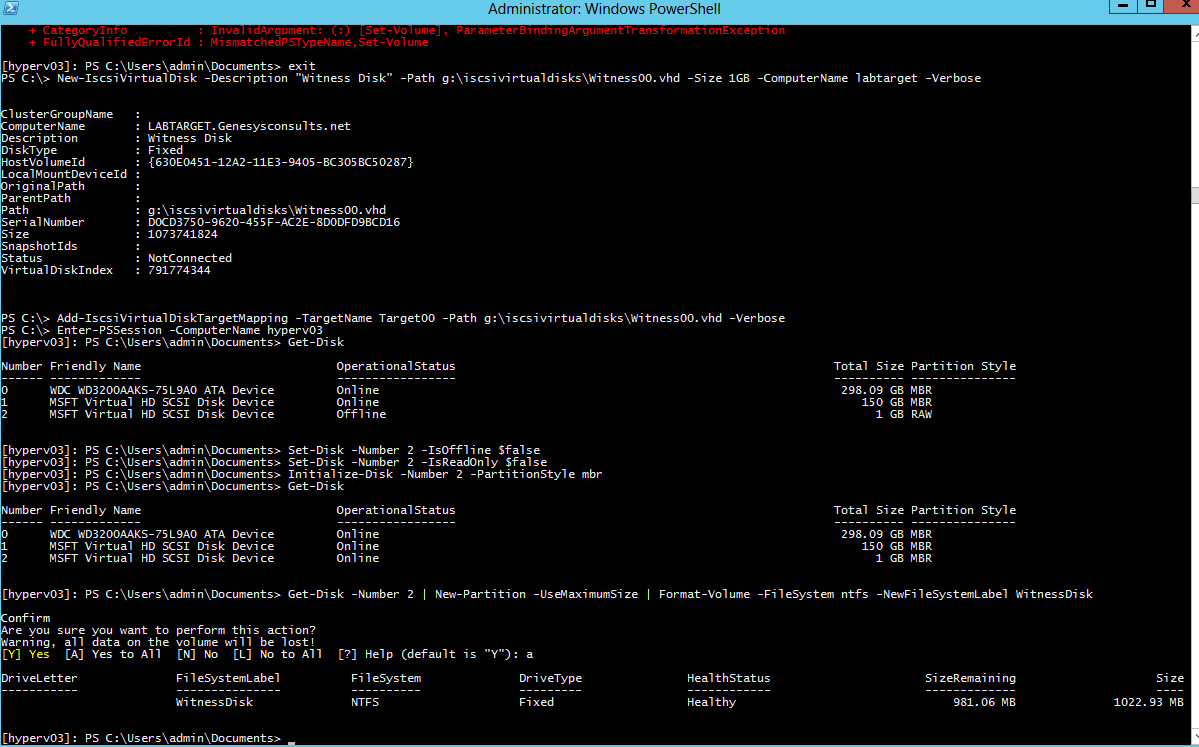
You could use the Disk Management GUI to verify the disk. This disk will be used as the Witness/Quorum disk when setting up the Cluster in the next parts of the series.
