Here we go over my steps for the actual cluster creation, cluster and node validation, quorum setup and cluster shared volume configuration.We have by running a cluster validation on each node. This can be achieved with the following cmdlets:
Test-Cluster -Node hyperv01
Test-Cluster -Node hyperv03
In this case, the test passed. The process basically gives us an idea if the nodes’ config are capable of supporting our cluster, with recommendations on what config changes if any we need to apply.
We’ll go ahead and create the cluster without storage at this time:
New-Cluster -Name Cluster00 -Node Hyperv01,Hyperv03 -StaticAddress 10.0.0.4 -NoStorage
We’ll use the Get-ClusterAvailableDisk cmdlet to display available disks for the cluster nodes and pipe the cmdlet to the add-ClusterDisk cmdlet: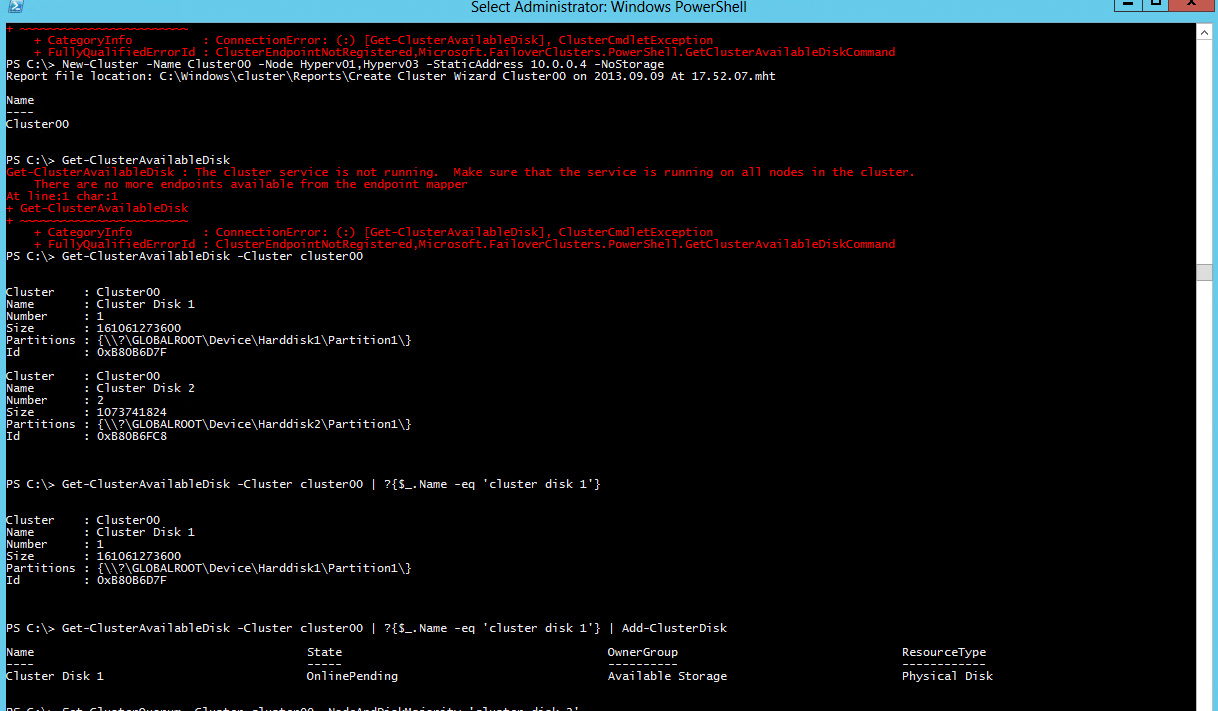
Get-ClusterAvailableDisk -Cluster cluster00 (Displays the disks available to the nodes in the cluster)
Get-ClusterAvailableDisk -Cluster cluster00 | ?{$_.Name -eq ‘cluster disk 1’} | Add-ClusterDisk ( Adds the available disk to the cluster)
Add-ClusterSharedVolume -Name “Cluster Disk 1” -Cluster cluster00 (Makes the volume available in Cluster Shared Volumes in a failover cluster.)
Display the remaining available disk and also add to the cluster:
Get-ClusterAvailableDisk -Cluster cluster00 | Add-ClusterDisk (Add the remaining disk we earlier reserved as witness to the cluster)
Reconfigure the cluster disk quorum:
Set-ClusterQuorum -Cluster cluster00 -NodeAndDiskMajority “Cluster Disk 2” -Verbose (Set the quorum configuration of the cluster to NodeAndDiskMajority)
The following screenshot illustrates this step: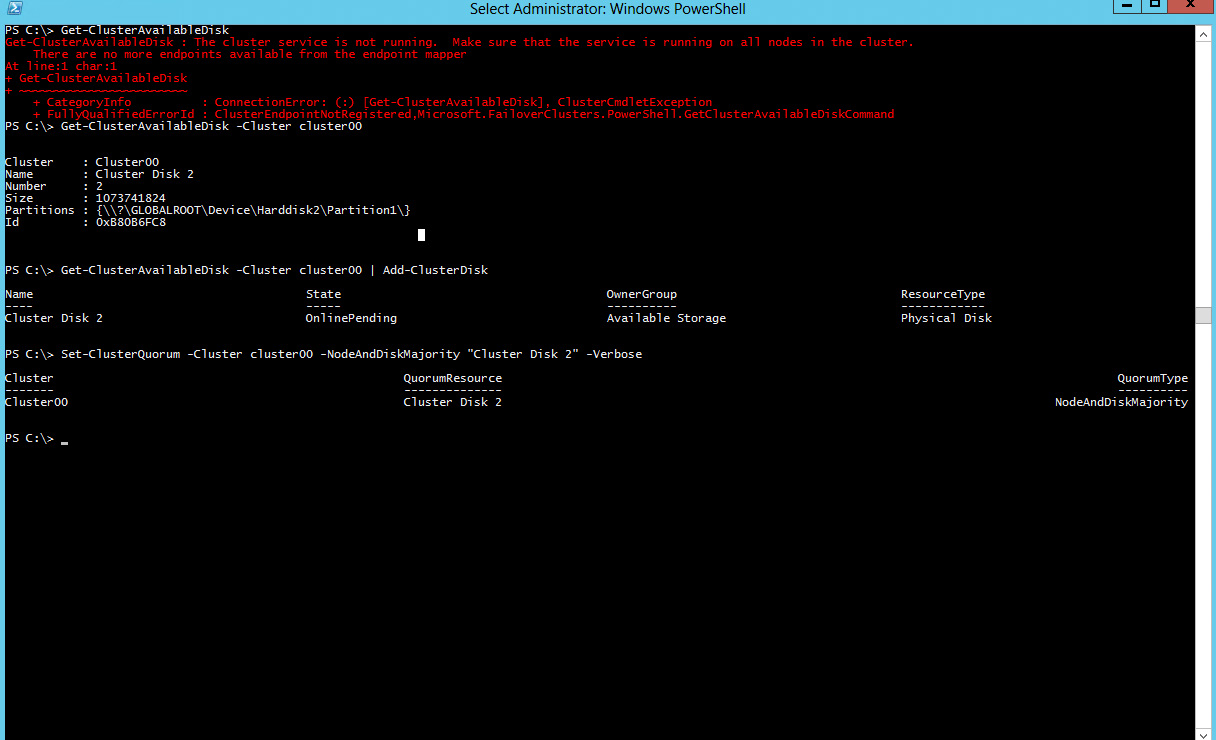
The PowerShell cmdlets can also be put together in a script to automate the tasks. At this point, we could choose to continue managing the cluster using the Failover Cluster Manager GUI or PowerShell. The next screenshot displays the disks as shown in FCM GUI interface: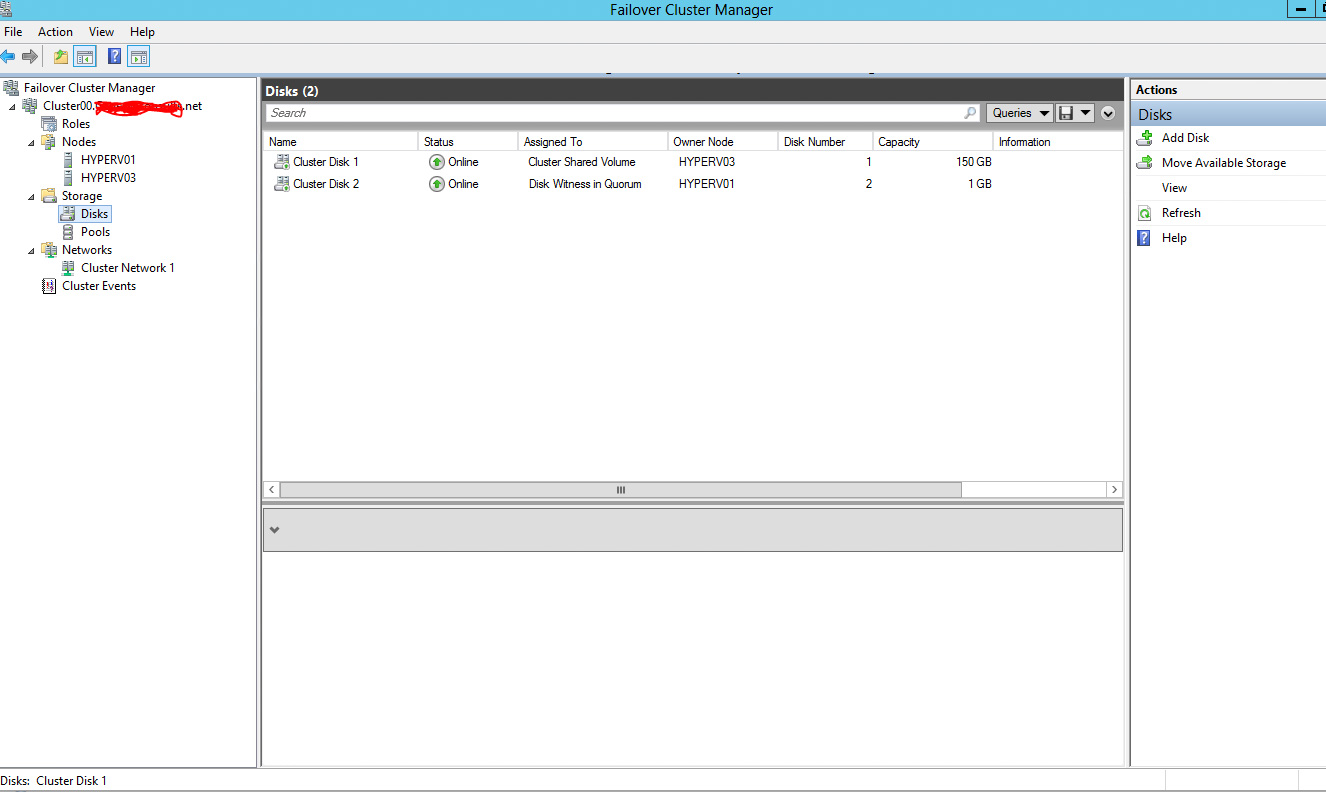 To be continued..
