Basic 802.1X Wireless network implementation requires an alphanumeric network key for access and authentication. In an enterprise environment this is not ideal. I’ve recently reconfigured and redesigned a client site’s WPAPersonal Wireless network for Radius (Remote Authentication Dial-In User Service) Authentication on an NPS (Network Policy Server) Server running on the Windows Server 2012R2 platform . Some of the benefits of this redesign are as follows:
1) User access control is managed with usernames and passwords in Active Directory. This replaces easily distributed and insecure network keys.
2) Administrators can more easily manage user and device credentials and centrally revoke access if and when necessary.
In this post, I provide my configuration steps in setting up Microsoft Protected Extensible Authentication Protocol with Microsoft Challenge Handshake Authentication Protocol (MS-CHAP) version 2 authentication. The wireless network is built on the UniFi brand of Access Points with the Windows Server 2012 R2 Network Policy Server (NPS) as the RADIUS server.
Configuration and Setup Elements:
1) WS2012R2 Certificate Authority Server.
2) Network Policy Server on WS2012R2.
2) UniFi AC Access Points and Controller.
4) Group Policy Object configuration for Certificate Auto-enrollment and Wireless 802.1X.

Install and Configure the Active Directory Certificate Services and Certification Authority Role using PowerShell.
Use the following PowerShell cmdlet to install Active Directory certificate services for a Certification Authority role service on a domain joined member server.
Install-WindowsFeature -Name ADCS-Cert-Authority -IncludeManagementTools
Please note that after installation, the Certificate Authority Server will need to be configured as an Enterprise Certificate Root CA. Microsoft has a detailed step-by-step instruction on setting up an Enterprise CA server at the following NPS Server Certificate: CA Installation link.
A summary of the server configuration is as follows:
After the role installation, open the Server Manager console. On the Server Manager tab, click on the Configure Active Directory Certificate Server link and follow the wizard page.
On the Select Role Services page, ensure that Certification Authority is selected, select any additional role services that you require, and then click Next .
On the Specify Setup Type page, ensure that Enterprise is selected, and then click Next .
On the Specify CA Type page, click Root CA , and then click Next .
On the Set Up Private Key page, ensure that Create a new private key is selected, and then click Next .
On the Configure Cryptography for CA page, keep the default settings or change them according to your requirements. Note that the default Key character length is 2048, which is twice as large as previous default key character lengths of 1024. Depending on your network size and traffic, you might want to adjust the size of the key character length. Click Next .
On the Configure CA Name page, keep the suggested common name for the CA or change the name according to your requirements, and then click Next .
On the Set Validity Period page, in Select validity period for the certificate generated for this CA , type the number and select the time value (years, months, weeks, or days) that determines the date upon which certificates issued by the CA will expire. The default setting of five years is recommended. Click Next .
On the Configure Certificate Database page, in Certificate database location and Certificate database log location , specify the folder location for these items. I kept the default locations. If you specify locations other than the default locations, ensure that the folders are secured by using access control lists (ACLs) that prevent unauthorized users or computers from accessing the CA database and log files. Click Next , and then click Finish .
Configure Certificate Autoenrollment for the Designated Network Policy Server.
In this section, I’ll configure the certificate template that Active Directory® Certificate Services (AD CS) uses as the basis for the server certificate that will be enrolled to the Network Policy Server (NPS).
1) Login to the CA server running WS2012 R2, and open the Certificate Authority console.
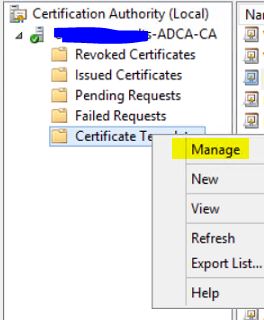
2) In the CA management console, expand the tree, and right click on the Certificate Templates folder and select Manage.
3) In the Certificate Templates console, all of the certificate templates are displayed in the details pane.
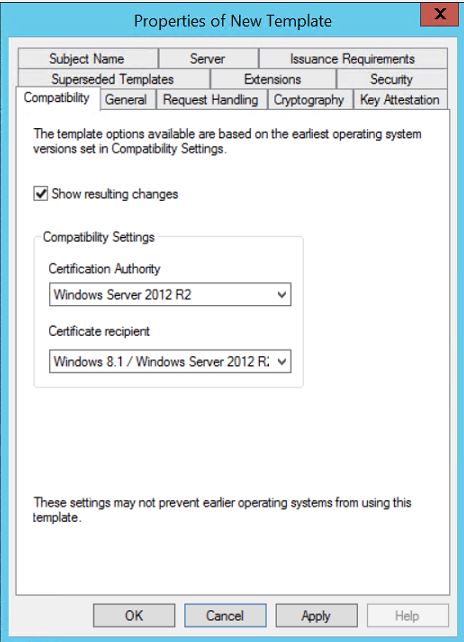
4) In the details pane, click the RAS and IAS Server template. On the Action menu, click Duplicate Template . In the Duplicate Template dialog box, select the template version appropriate for your deployment, and then click OK . The new template properties dialog box opens.
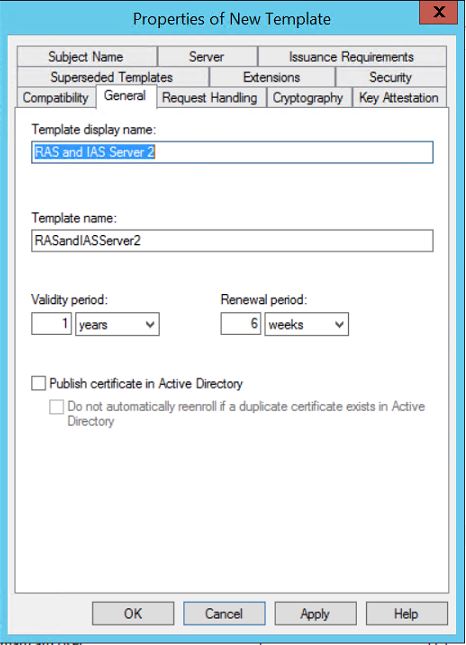
5) On the General tab, in Display Name , type a new name for the certificate template. I renamed my template to RAS and IAS Server2.
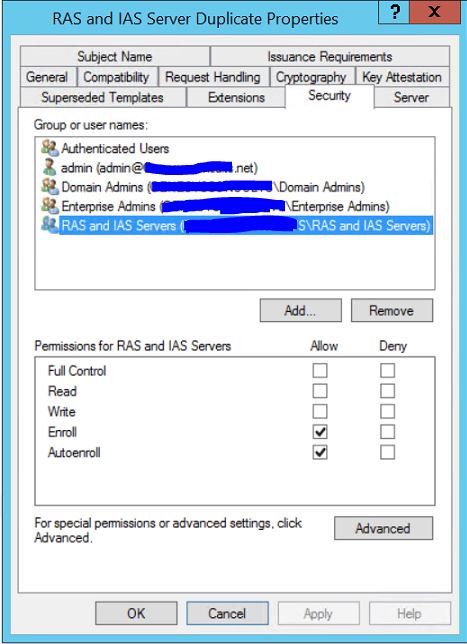
6) Click the Security tab. In Group or user names , click RAS and IAS Servers . In Permissions for RAS and IAS servers , under Allow , select the Enroll and Autoenroll permission check boxes, and then click OK .
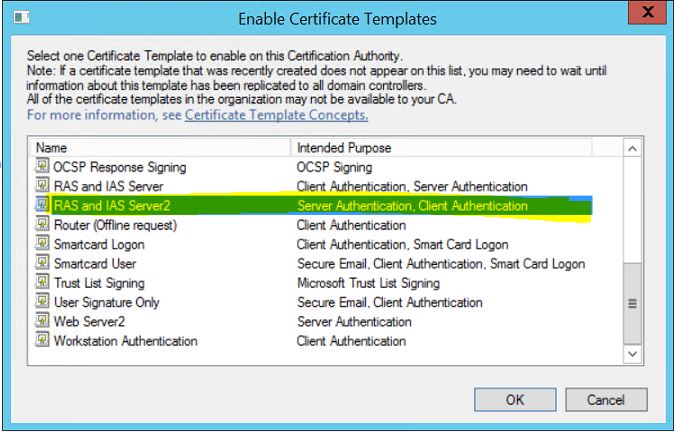
7) Back on the Certificate Authority page , expand the CA name, and then right click Certificate Templates, select New , and then click Certificate Template to Issue . The Enable Certificate Templates dialog box opens.
8) In Enable Certificate Templates , click the name of the certificate template you just configured, and then click OK . For this deployment, I changed my template name to RAS and IAS Server2, so I’ll click RAS and IAS Servers2 , and then click OK .
9) On the same server, open the Group Policy Management Console. Right click on the GPO folder and select New to create a new GPO . in the name field, enter a name for the new GPO. I called mine the NPS Certificates Policy. Click OK.
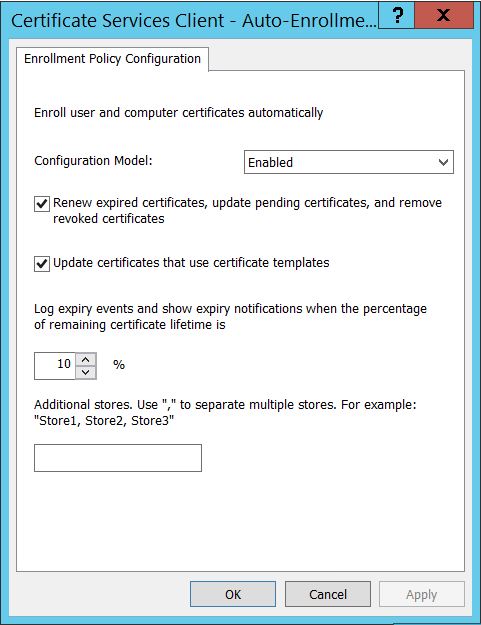
10) Open Computer Configuration , Policies , Windows Settings , Security Settings , and then select Public Key Policies. In the details pane, double-click Certificate Services Client – Auto-Enrollment . The Certificate Services Client – Auto-Enrollment Properties dialog box opens.
11) In the Certificate Services Client – Auto-Enrollment Properties dialog box, in Configuration Model , select Enabled . Select the Renew expired certificates, update pending certificates, and remove revoked certificates check box. Select the Update certificates that use certificate templates check box, and then click OK .
12) After you complete this procedure, servers running NPS automatically enroll a server certificate when Group Policy is refreshed. To refresh Group Policy, restart the server or, at the command prompt, run gpupdate . In the next section, I will install NPS. After the install, I’ll run gpupdate to auto enroll a server certificate for the NPS server.
Install and Configure the Network Policy Server Role using PowerShell.
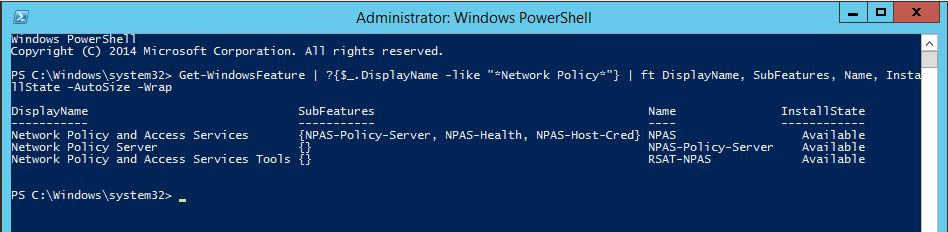
Check for and verify availability of the Network Policy feature:
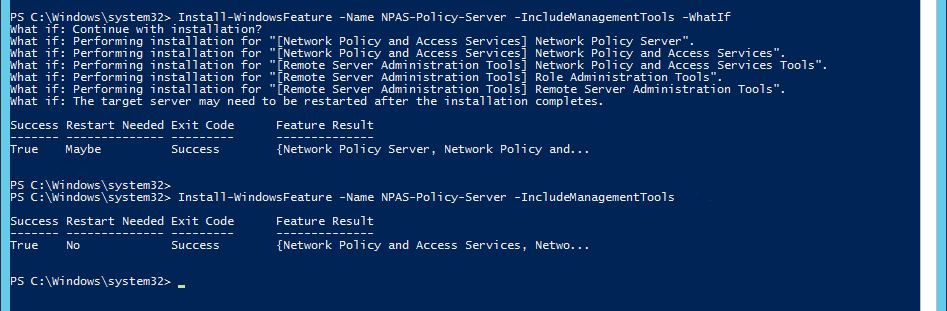
Install the Network Policy role using PowerShell:
Run gpupdate to autoenroll the Network Policy server for a server certificate.
Configure the Radius Client:
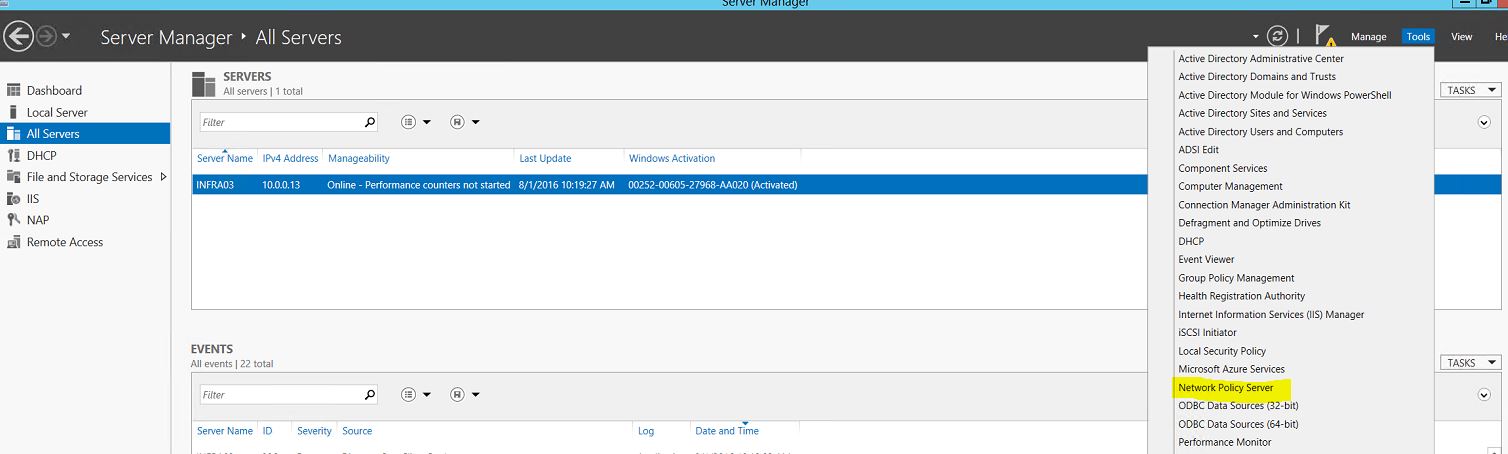
Open the Server Manager console and highlight the “All Server” command. Select the current server.
Navigate to the Tools menu and select the “Network Policy Server” command. This should open up the Network Policy Server console:
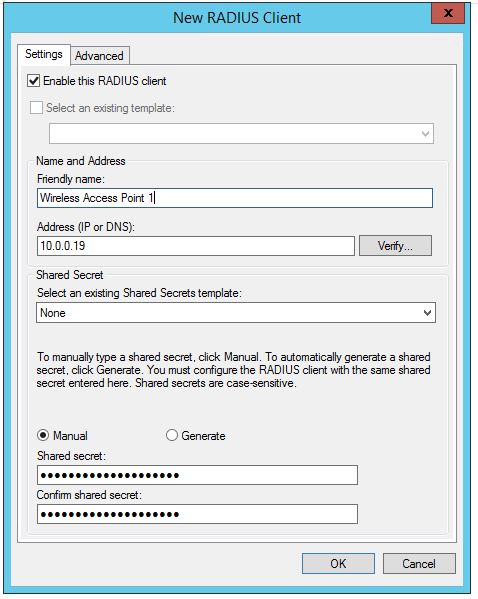
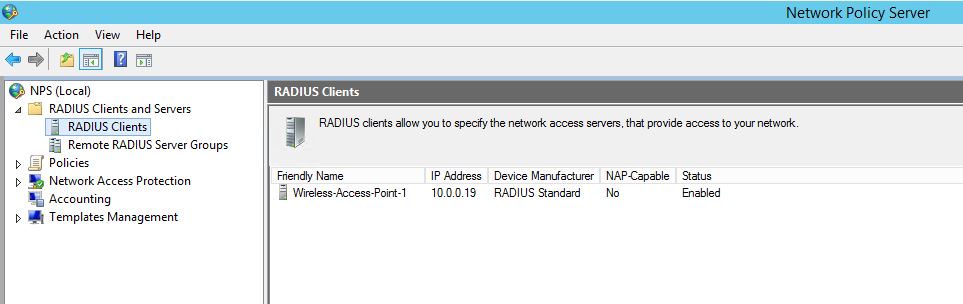
In the Network Policy Server console, expand the ‘Radius Clients and Servers’ folder, “Radius Clients” sub folder and select the New command.
In the “New Radius Client” dialog, enter the values for the following fields indicated the following screen shot and click ok. The Address field refers to the IP Address of the Access point. Run through this step for as many Access points and clients that need to be setup on the Radius server:
Configure Wireless Policy:
Highlight the NPS server folder, under the standard configuration drop down, select the “Radius Server for 802.1X Wireless or Wired Connections” standard config
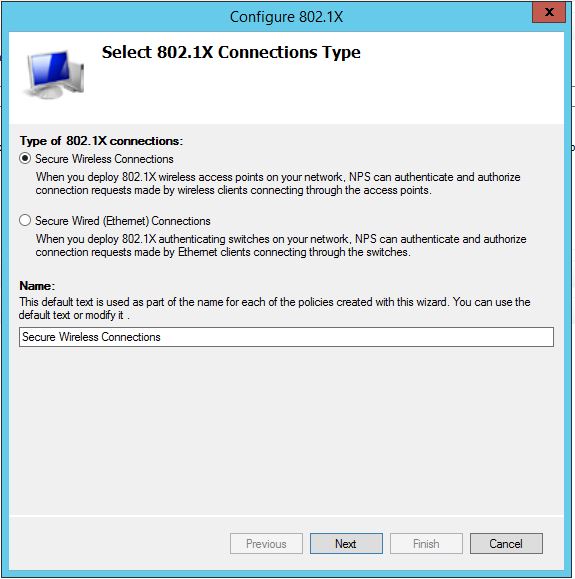
Click the “Configure 802.1X” link.
In the “Select 802.1X Connection Type” window, select the “Secure Wireless Connections” option and leave the default name or change as needed. Click next.
In the “Specify 802.1X Switches” page verify that the Access Points configured under Radius Clients are in the list.Click next.
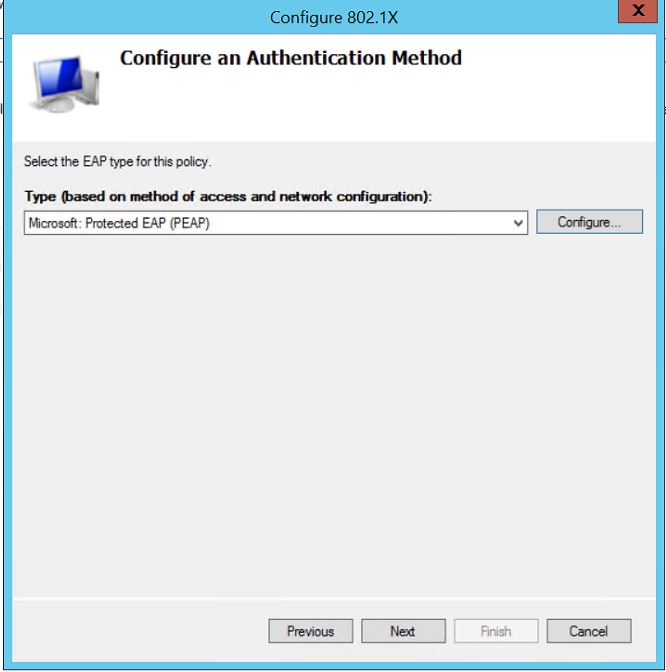
In the “Configure Authentication Method” page, select an EAP type from the drop down. I selected the “Microsoft:Protected EAP”.
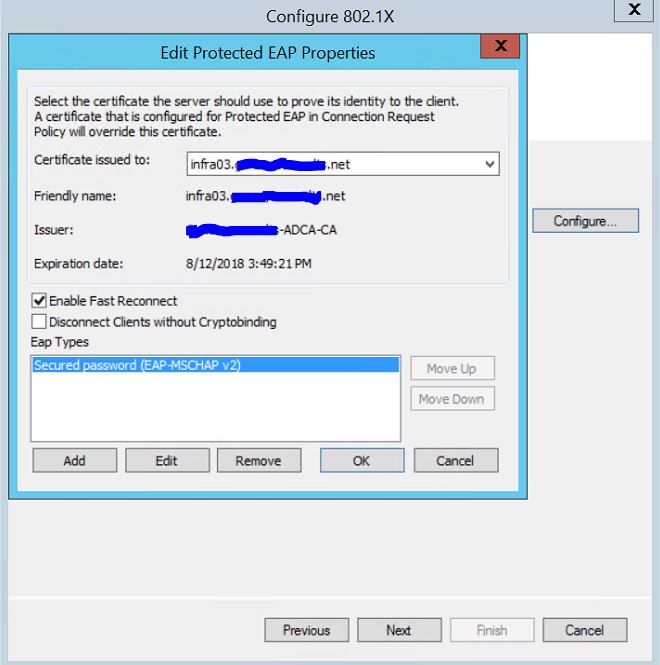
Still on the “Configure an Authentication Method” page, click the Configure button to open the “Edit Protected EAP Properties” page.Add the EAP Type of “Secured Password (EAP-MSCHAPv2) and select the NPS server name for the “Certificate Issued to” field. This field is autopopulated because we already enrolled the NPS for a Network Policy certificate by running gpupdate.
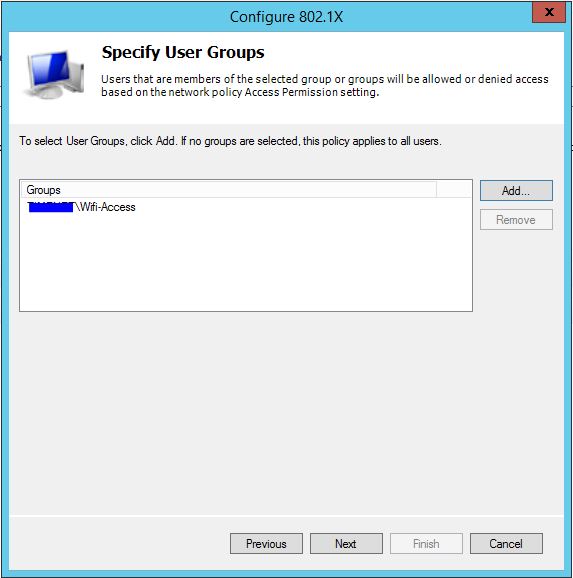
In the “Specify User Groups” page, click Add to enter an Active Directory group for allowing access to group members based on the network policy. Click next.
Click next on the “Configure Traffic Controls” page.
On the “Completing New IEEE 802.1X Secured Wired and Wireless” page , click finish.
Configure Group Policy Object for Wireless Clients running Windows Vista and Later.
1) Open Group Policy Management Console. Right click on the GPO folder and select New to create a new GPO . in the name field, enter a name for the new GPO. I called mine the NPS Clients Configuration Policy. Click OK.
2) Open Computer Configuration , Policies , Windows Settings , Security Settings , and then right click Wireless Network (IEE802.11) Policies and select to “Create a New Windows Vista and Later Releases Policy”.
3) On the General tab, in Policy Name , type a new name for the policy, Lab Wireless Network Policy. In Description , type a description of your policy. Select the Use Windows WLAN AutoConfig for clients check box to specify that WLAN AutoConfig is used to configure wireless network adapter settings.
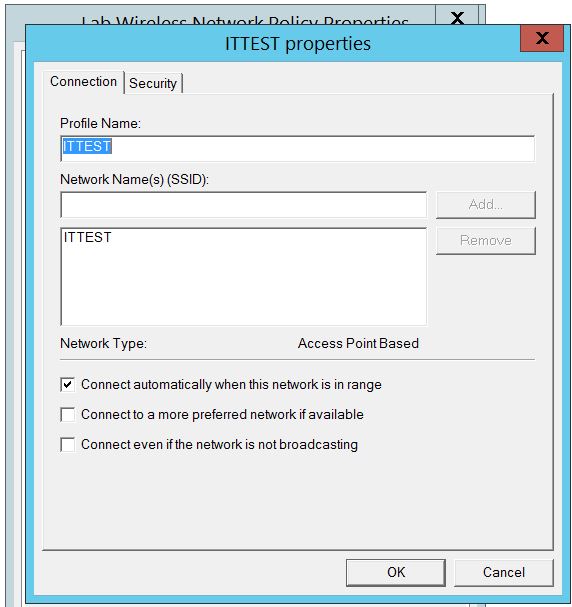
4) Still on the General tab, in the ‘Connect to available networks in the order of profiles listed below: section, click Add and then select Infrastructure to add and configure a new wireless profile. This will open a New Profile properties page.
5) On the Connection tab, in Profile Name, type a name for the profile. In Network Name(s) (SSID), type the service set identifier (SSID) for your wireless APs, and then click Add .
6) To specify that wireless clients automatically connect to wireless APs for which the SSID is specified in Network Name(s) (SSID) , select Connect automatically when this network is in range .
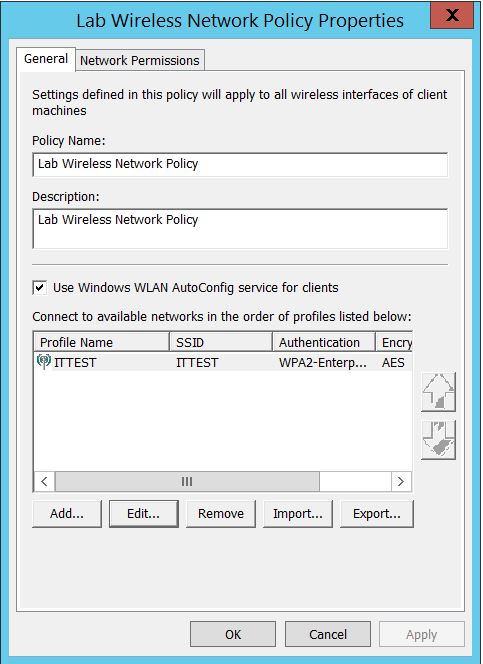
7) Click the Security tab. In Select the security methods for this network , in Authentication , I selected WPA2-Enterprise for my Access points. In Encryption , I selected AES. The settings for both Authentication and Encryption match the settings configured on my wireless AP.
8) In Select a network authentication method , I selected Microsoft: Protected EAP (PEAP) . In Authentication mode , I selected: User authentication. In Max Authentication Failures I entered 2. I enabled the check box for Cache user information for subsequent connections to this network.
9) Click Properties of the network authentication method, the Protected EAP Properties dialog box opens. In Protected EAP Properties , I enabled “Verify the server’s identity by validating the certificate” check box and the “Connect to these servers:” check box. I entered the fully qualified domain name of my radius server(NPS Server) in the text field.
10) In Trusted Root Certification Authorities , I selected the trusted root certification authority (CA) deployed in my domain as described earlier in this post that issued the server certificate to my server running Network Policy Server (NPS). Please note that this setting limits the trusted root CAs that clients trust to the selected CAs. If no trusted root CAs are selected, then clients trust all root CAs listed in their trusted root certification authority store.
11) For “notifications before connecting”, I selected “Tell user if server name or root certificate is not specified”.
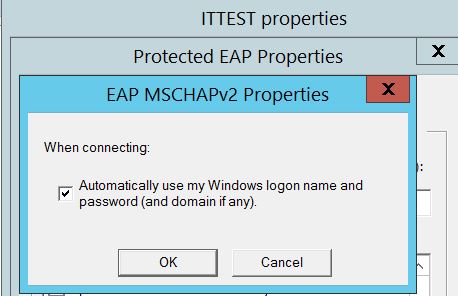
12) In Select Authentication Method , select Secured Password (EAP-MS-CHAP v2) . Enable PEAP Fast Reconnect, by selecting Enable Fast Reconnect . Click Configure . In the EAP MSCHAPv2 Properties dialog box, verify Automatically use my Windows logon name and password (and domain if any) is selected, click OK , and then click OK to close Protected EAP Properties .

13) On the Network Permission tab you can use the tick boxes to restrict clients to infrastructure networks or only GPO profiled allowed networks if you wish.
Configure my Unifi Wireless Access Points.
1) I’m using the Unifi Access Points. I’ll login, create a new wireless network and configure for Radius parameters with the highlighted values.

The IP Address field references the IP Address of the Network Policy server. I made sure to match the Radius Server Password/Shared Key with the shared key configured for the Access Point in the Network Policy Server in the “Install and Configure the Network Policy Server Role using PowerShell” section.
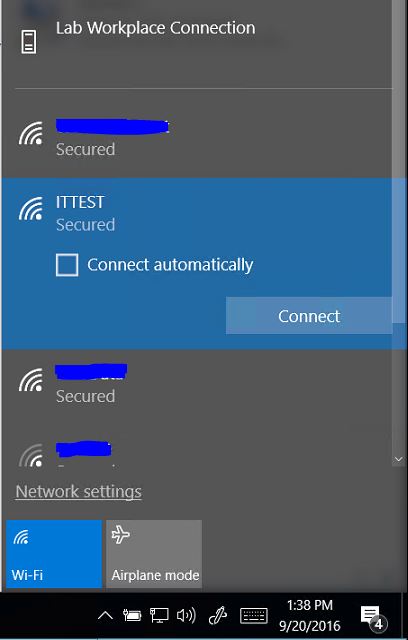
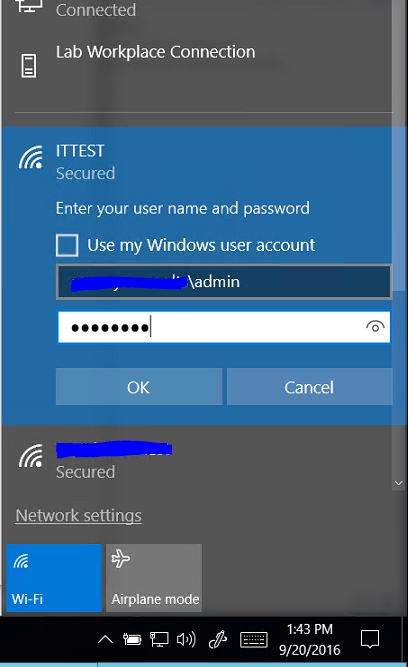
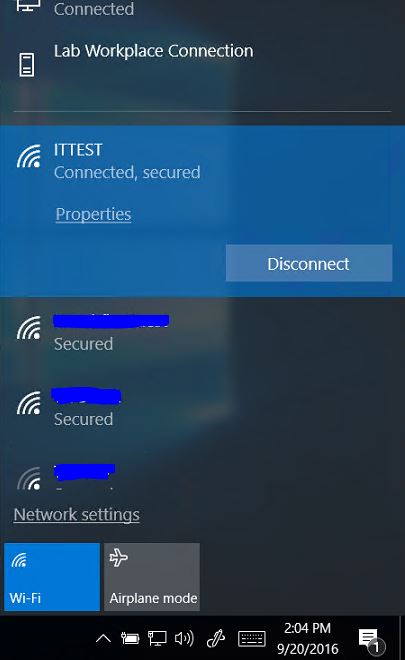
Connect Client PC Running Windows 10 to the Wireless Network.
To test the Radius configuration, login to a Windows laptop and run gpupdate to apply the Group Policy settings to the client machine. The screen shots below show the before and after status of the ITTEST Wi-Fi profile. You can choose to enter your username and password manually or check the box to connect automatically.

7 responses to “Secure Wireless Access and Authentication with Radius on WS2012R2 Network Policy Server .”
I’m having issue getting Windows 7 to work with this setup. Windows 10 works fine, but Windows keep trying to authenticate. I don’t see any event in the NPS Server Event Viewer regarding the Windows 7. I see events of Windows 10 successfully accessing.
I got it to work now.
Hello Kevin, thanks for coming on my page. I’m glad you got it working. Sorry I couldn’t respond, it’s been a busy period. I hope you found the post helpful. Thanks again.
I had the Similar setup the certificate on the root cert expired last week, after renew the root certificate windows7 stop working, anything after win7 work fine include andrioid and IOS. any clue?
Jim,
Go to your NPS Server and open a management console by typing in MMC. Add the snap-in Certificate for local computer. Go to Personal>Certificate and make sure one of your certificate, preferably the “RAS ans IAS” template, has something in the subject line and not blank. If you don’t, you have to enroll the certificate by right-click>All Tasks>Request Certificate. Choose the “RAS and IAS” template if you created it based on the instruction in this article. If not, choose “Domain Controller Template.” Hope that help.
We are working to setup wireless RADIUS for our AD clients and on the Windows 7 Pro systems, they will not connect automatically unless we untick Connect to these servers on the Protected EAP Properties for the GPO. Windows 10 clients connect without an issue.
Should we have an auto-enroll policy for our RADIUS clients?
Removed the initial settings from the NPS Policies and went through the RADIUS 802.1x wizard again and made sure to select the issued certificate that was created above from the RAS and IAS template, ran GPUPDATE on the client and now the test Windows 7 PC is connecting. This was due to the initial NPS certificate GPO not being applied to the server.
Looking at the NPS policy, network policy, under Constraints, should the less secure authentication methods MS-CHAP-v2 and MS-CHAP be checked or unchecked?
Thanks for the post, it was very helpful in setting up and figuring out what we had missed on our initial setup attempts.